Creating An Opening
Most openings are created automatically. When a leave request has Substitute Required selected, the Opening Information tab becomes available, and once an approver approves the request an opening is created from the details on it: time slots, title, description, and assignment category.
This page covers creating one by hand.
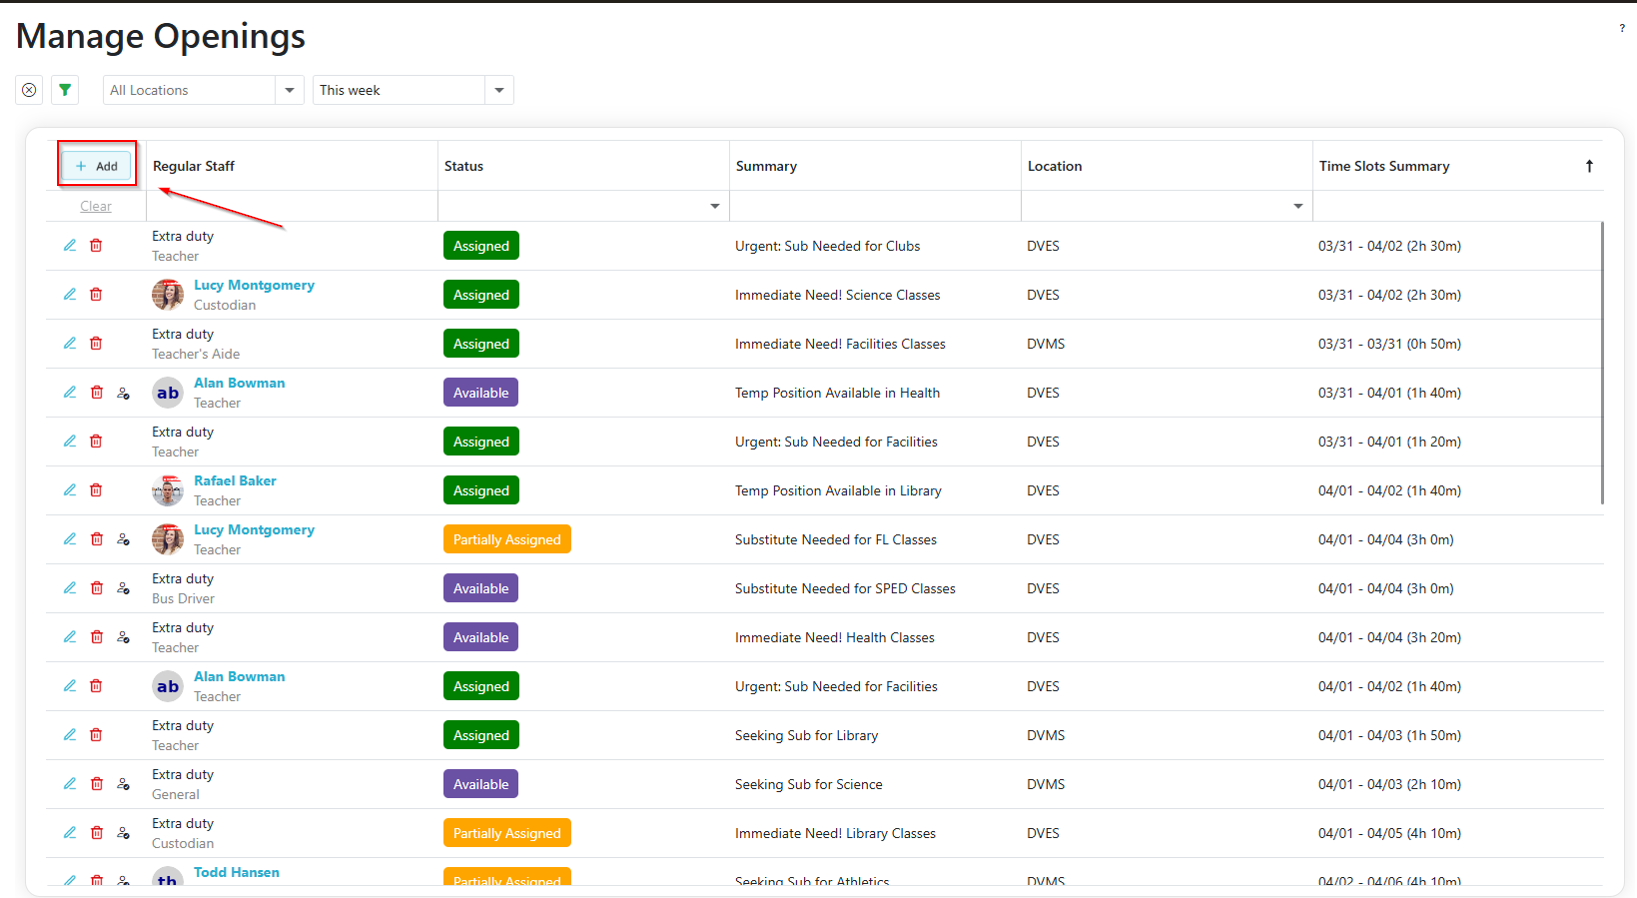
Step 1: Start Creating a New Opening
- Click the Add button to begin.
Step 2: Fill In the Opening
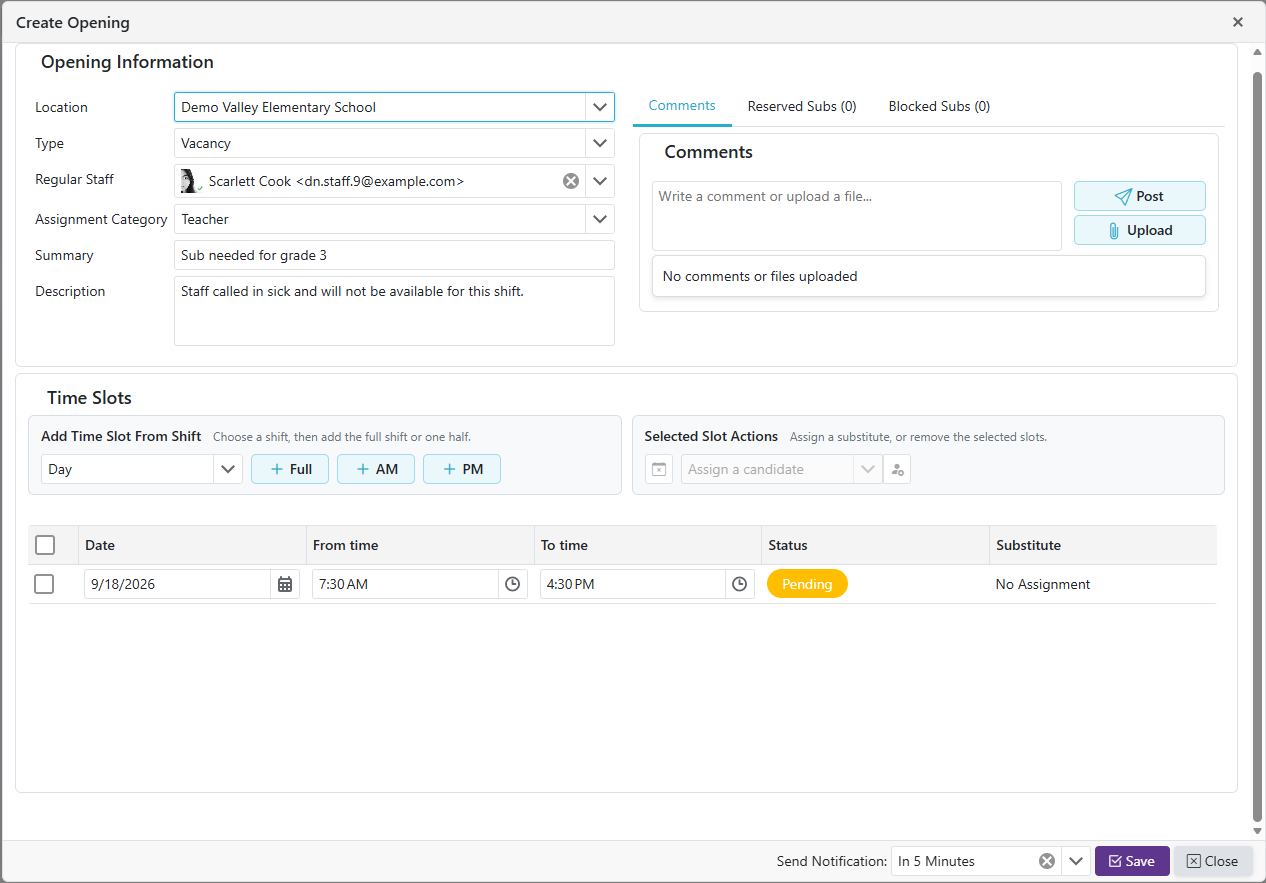
Work down the form in order. Location comes first because the rest of the form depends on it, including the shift picker used to add time slots.
- Location (required): the building the opening is for.
- Department: if the location uses departments, choose one. It is required if the location is set up to require one.
- Type: Extra Duty (the default) or Vacancy.
- Regular Staff: the staff member being covered. Required when the Type is Vacancy.
- Assignment Category (required): the category the substitute must be authorized to work.
- Summary (required, 3 to 500 characters): a brief description of the opening.
- Description (required, 3 to 5,000 characters): the detail a substitute needs to understand what the role involves.
Note: A staff member's default Summary and Description are set in the Edit User Locations/Departments window on the All Locations > Staff tab, separately for each Regular Staff unit. They fill in only if Summary and Description are still empty when you choose the staff member. You can still edit either before saving.
Step 3: Add Time Slots and Assign Substitutes
Time slots are added from the location's shifts, so the times come from the shift itself rather than being typed in.
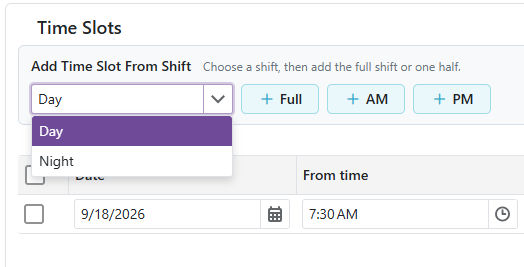
a. Choose a shift, then add the full shift or one half.
- If the location has more than one shift, pick one from the Select a shift dropdown first. Until a Location is chosen on the opening, the dropdown reads Select a location first and cannot be used.
- If the location has only one shift, there is no dropdown and you go straight to the buttons.
b. Click one of the split buttons to add the slot:
- Full: the whole shift, from its start time to its end time.
- AM and PM: the two halves of a shift that runs from morning into the afternoon.
- 1st Half and 2nd Half: the two halves of a shift that does not cross midday.
The buttons are disabled until a shift is selected.
c. Repeat for as many slots as the opening needs. Each slot is listed with its Date, From time, To time, Status, and Substitute.
Selected Time Slot Actions
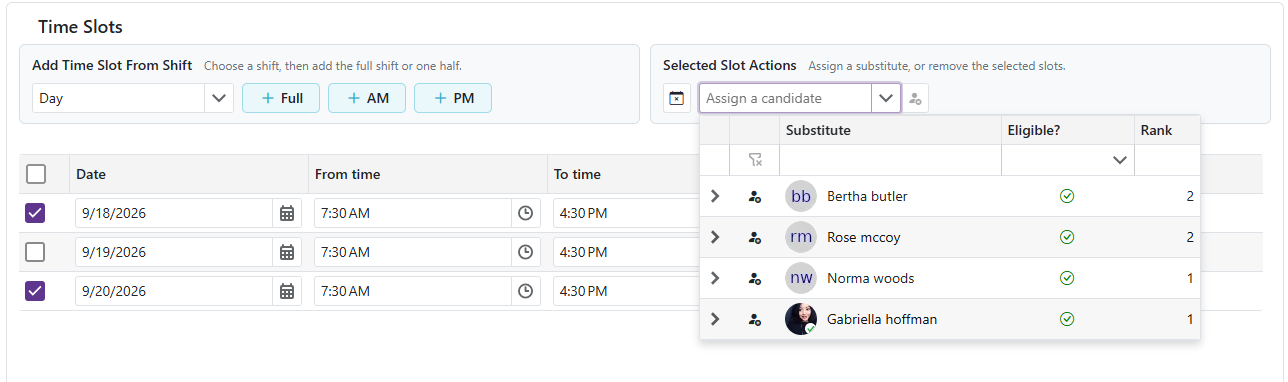
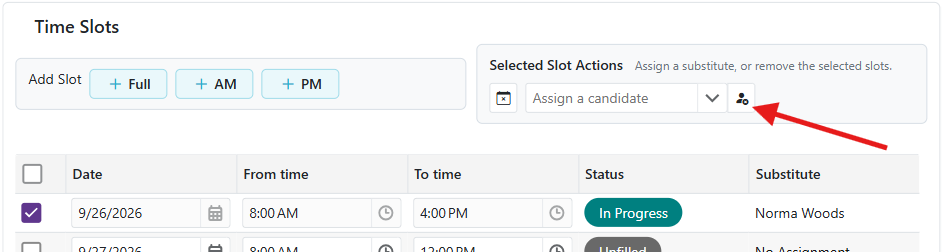
Select the checkbox on one or more time slot rows, then use the Selected Time Slot Actions toolbar.
Note: In a narrow window these buttons shrink to icons. Hover over one to see its name.
-
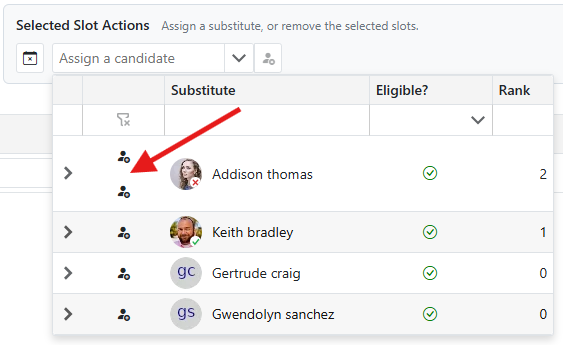
Assign a substitute: open the Assign Substitute picker in the toolbar and choose one. They appear in the Pending Action column, meaning they will be assigned once you click Save. To add more slots for the same substitute, select those rows too. To assign someone different, clear the picker, select the slots you want, then choose the other substitute. If the substitute isn't eligible for a slot, a Candidate Results window explains why and the slot isn't assigned.
- If a substitute is authorized at the location through more than one Substitute Management Unit (SMU), the picker shows one button per SMU for that substitute, labeled with the SMU's name, instead of a single select button. Click the SMU the assignment should go through.
-
Unassign a substitute: select the slot rows and click Unassign Substitute.
-
Remove a time slot: select the slot rows and click Remove Time Slot. It is disabled for slots that cannot be canceled. A slot you just added is removed right away. A saved slot shows To be canceled until you click Save; if it has a substitute, you're asked for a reason.
Step 4 (Optional): Reserve This Opening For Specific Substitutes
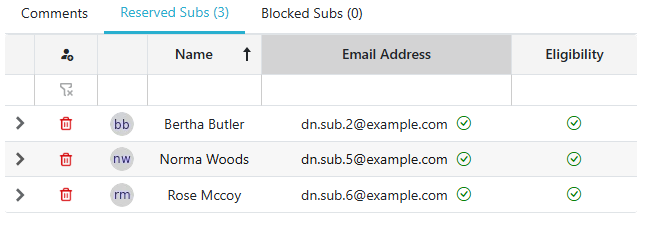
- Go to the Reserved Subs tab. The tab label shows how many substitutes are currently reserved. This tab appears once a Location has been selected.
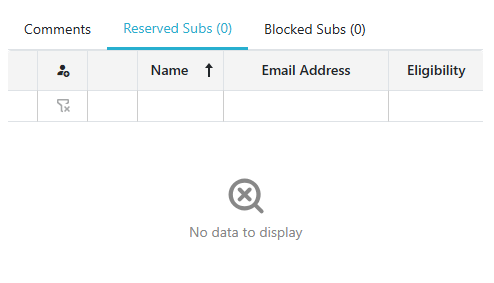
- Click the
 button to open the Add a reserved sub popup, which lists the substitutes considered for this opening and whether each one is currently eligible.
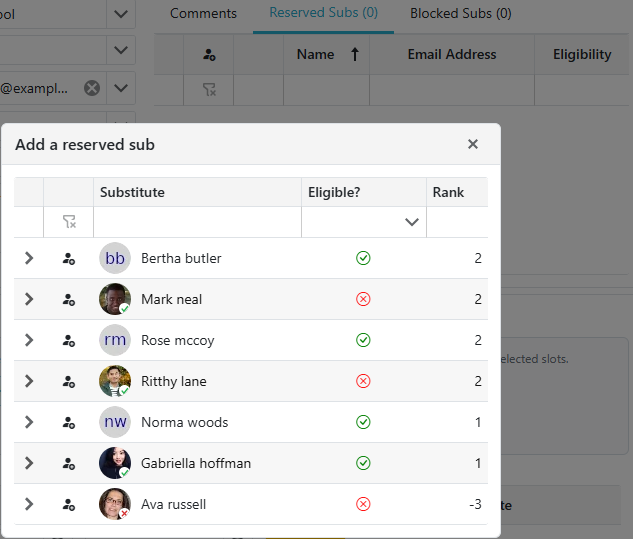
- Click the button on a substitute's row to reserve the opening for them. Repeat to reserve it for more than one substitute.
-
Once the list has at least one name, the opening is reserved. Every other substitute is restricted from it: they are not notified about it, and it appears under their Ineligible Openings rather than Available Openings. A manager can still assign a substitute who is not on the list.
-
Reserving a substitute does not make them eligible on its own. The Eligibility column shows where each reserved substitute stands right now:
- Eligible
 : they qualify for the opening.
- Restricted
 : something counts against them, but a manager can still assign them.
- Not Eligible
 : they can't take the opening right now.
- N/A: there are no open time slots left to check them against.
- Eligible
-
Expand a row to see the reasons. Rows marked N/A have nothing to expand.
-
To remove a reservation, click the
 icon next to their name. Clearing the list entirely returns the opening to normal.
-
If a reserved substitute declines the opening, they are removed from this list and added to the blocked list. They are never on both. Undeclining lifts their block but does not restore the reservation, so add them back here if you still want the opening held for them.
Step 5 (Optional): Block a Substitute From This Opening
- Go to the Blocked Subs tab.
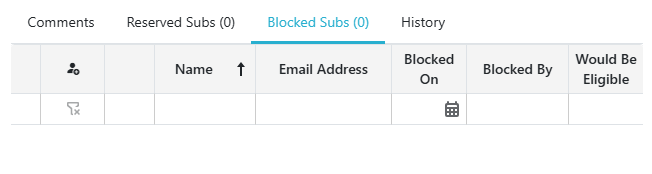
- Click the button to open the Block a substitute popup, which lists the substitutes considered for this opening and whether each is eligible.
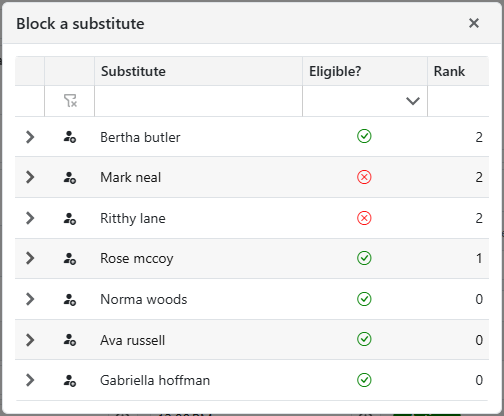
- Click the on a substitute's row to block them from this opening. They'll be excluded from the candidate list and won't be notified about it, but only for this specific opening, not anywhere else.
-
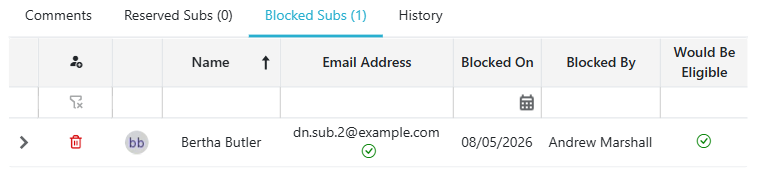
The Blocked Subs grid shows each blocked substitute's Name, Email Address, Blocked On, Blocked By, and Would Be Eligible. To unblock someone, click the
icon (Remove Block) on their row. -
Would Be Eligible shows how the substitute would stand if you hadn't blocked them:
- Eligible : nothing else stops them.
- Restricted : a manager could still assign them.
- Not Eligible : they'd be ineligible for other reasons as well.
- N/A: there are no open time slots left to check them against.
- Eligible
Step 6 (Optional): Add Comments And/Or Attachments
Comments and attachments share the same input area at the bottom of the opening, and appear together in the same thread.
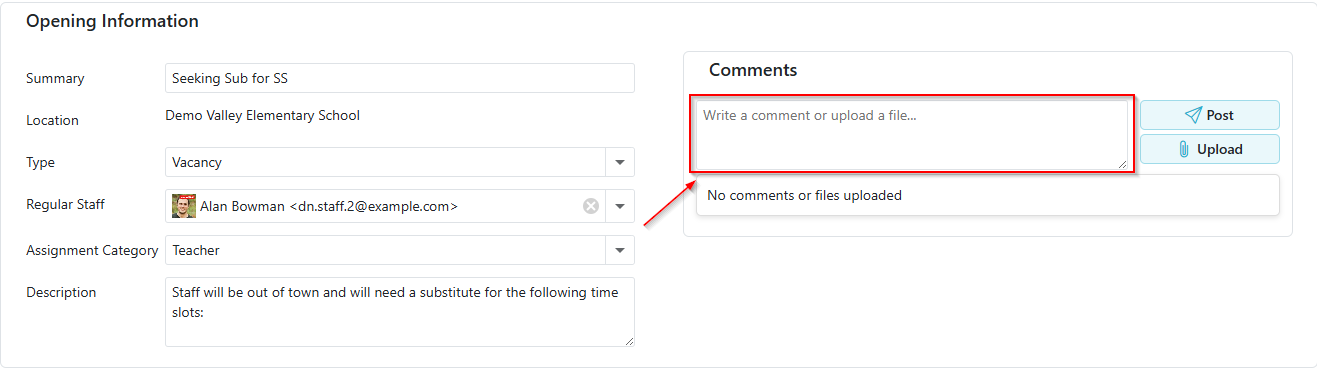
Comments
- Type your comment in the input field, then click the
 button. Be clear and concise so potential substitutes can understand it easily.
- Post as many comments as you need.
- To remove a comment, click the icon on it. You can only remove your own comments.
Attachments
- Drag and drop a file into the input field, or click the
 button to pick one from your computer. Repeat for as many files as you need.
- To download an attachment, click the
 icon on it.
- To remove an attachment, click the icon on it. You can only remove your own attachments.
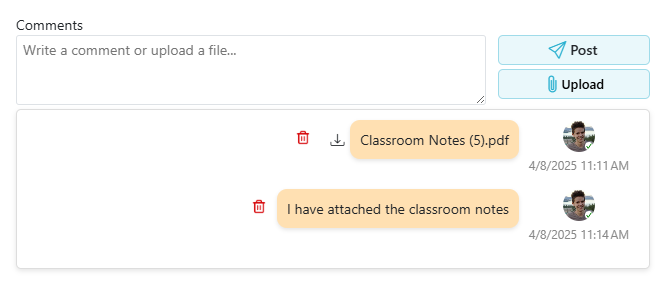
- Comments and attachments from other users appear in blue, on the left.
Step 7: Save and Create the Opening
- Choose when eligible substitutes are notified in Send Notification, next to Save. It defaults to five minutes after saving; Never sends no notification.
- Click Save to create the opening.